Editing Articles
All knowledge base articles are edited through the HubSpot Knowledge Base editor. Changes go live as soon as you publish, there is no staging environment.
How to edit an existing article
- Log in to HubSpot and go to Service → Knowledge Base.
- Search for the article by name, or browse by category.
- Click the article title to open it in the editor.
- Make your edits in the rich-text body area.
- When finished, click Update (top right) to publish immediately.
Creating a new article
- Go to Service → Knowledge Base and click New article.
- Enter the article title — this also auto-generates the page URL slug (you can edit it in Article Settings).
- Assign the article to a Category and optionally a sub-section using the right-hand settings panel.
- Write the body content, add images or files as needed.
- Fill in the Article Settings fields (see Article Settings below).
- Click Publish when ready to make it live.
Formatting tips
- Heading 1 is automatically used for the article title — never use it inside the article body.
- Use Heading 2 for top-level sections within the article body, and Heading 3 for sub-sections within those.
- Keep paragraphs concise. Long blocks of text are harder to scan.
- Use bullet lists for steps or options, numbered lists for sequential procedures.
- For collapsible content, use the Accordion shortcode. For highlighted notes or warnings, use the Callout shortcode.
Article Settings
The settings panel on the right side of the editor controls how the article appears in search results, who can view it, and where it lives in the site structure. Click Settings in the top-right panel tabs to access it.
| Field | Description | Notes |
|---|---|---|
| Title | The article's display name — shown in the browser tab, breadcrumb, and category article list. | Required |
| Meta description | A short summary (1–2 sentences) shown in search engine results under the page title. Aim for 120–155 characters. | Required |
| Tags | Keywords that help users find the article via the knowledge base search bar. Add as many relevant tags as appropriate. | Optional |
| Category | The top-level category the article belongs to (e.g., Equity Management). This determines which category page the article appears on. | Required |
| Subcategory | Groups the article under a named sub-section within the category page. Subcategories do not have their own URL — they appear as sections on the category page. | Optional |
| Page URL | The URL slug for this article (e.g., /support/how-to-add-a-shareholder). Auto-generated from the title but can be edited. Changing it will break any existing inbound links. |
Required — edit with caution |
| Audience access | Controls who can view the article. Options include Public (anyone), Private — Login required, or Private — Password required. The locked internal categories use Private access. | Required |
If you change a published article's Page URL, the old URL will return a 404. Update any internal links to that article before or immediately after changing it.
Uploading Images
Images embedded directly in article content (screenshots, diagrams, etc.) are inserted using the standard HubSpot image tool — no extra steps needed.
How to insert an image
- Place your cursor in the article body where you want the image to appear.
- In the editor toolbar, click the Image button (mountain icon).
- In the dialog that opens, click Upload to upload a new image from your computer, or browse previously uploaded images.
- Select or upload your image, then click Insert.
- After inserting, you can click the image to resize it or add alt text using the toolbar that appears.
Best Practices:
- Always fill in the Alt text field for accessibility and SEO.
- Prefer PNG for screenshots, JPEG for photos.
- Keep images under 1 MB to avoid slow page loads.
- Resize images to the intended display width before uploading (e.g., 800–1200px wide for full-width images).
Note:
Images uploaded via the article editor are stored in HubSpot's general file manager automatically. You do not need to pre-upload them separately.
Uploading Downloadable Files
PDF templates, spreadsheets, and other files that visitors download (rather than view inline) must be uploaded to a specific folder in the HubSpot File Manager before you can link to them in an article. Do not use the image button for downloadable files.
Step 1 — Upload the file to the File Manager
- Open the FPS Knowledge Base files folder in HubSpot File Manager:
- Click Upload files and select the file from your computer.
- Once uploaded, click the file to open its detail panel.
- Click Copy URL to copy the direct download link to your clipboard.
Step 2 — Link to the file in an article
- In the article editor, select the text you want to turn into a download link (e.g.,"Download the template here").
- Click the Link button in the toolbar (or pressCtrl+K/Cmd+K).
- Paste the File Manager URL you copied in Step 1.
- Click Apply
Links from the old Zendesk system (URLs containing article_attachments or support.fidelityprivateshares.com/hc/en-us/article_attachments/) are broken — those files no longer exist. Any such links must be re-uploaded to the HubSpot File Manager and re-linked.
Accordions (Expandable Sections)
Accordions let you hide secondary content behind a clickable header that expands when clicked. They're great for FAQs, step-by-step details, or supplemental information that not every reader needs.
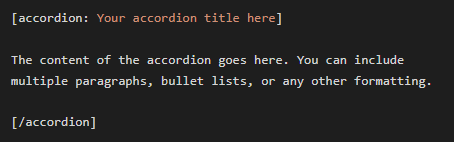
How it looks
Shortcode syntax
How to add an accordion
- Type or paste the shortcode where you want the accordion to appear.
- Put your title after
[accordion:and before the closing]. - Place the accordion body content between the opening and closing tags.
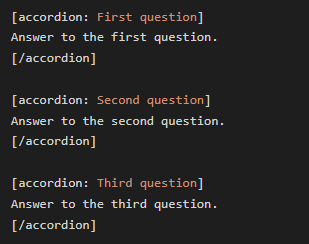
Multiple accordions in a row
You can stack multiple accordions one after another. Place them back-to-back — no wrapper needed:
Callouts (Highlighted Notes)
Callouts draw attention to important information — tips, notes, cautions, and warnings. There are four types, each with a distinct colour.
Callout types
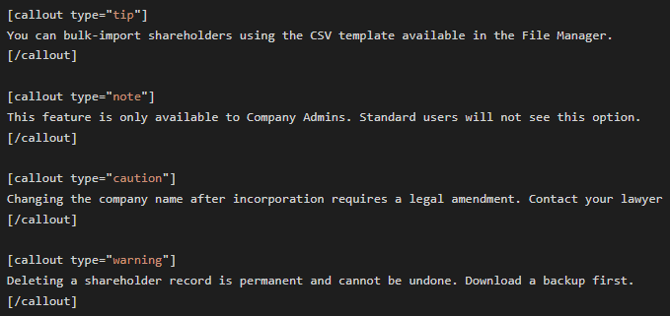
Tip A helpful suggestion or best practice. Use for optional improvements or time-saving advice.
Note Supplemental information the reader should be aware of. Use for context, exceptions, or clarifying details.
Caution Something the reader should be careful about. Use when an action could cause problems if done incorrectly.
Warning A serious risk or potentially irreversible consequence. Use sparingly for truly critical alerts.
Shortcode Syntax
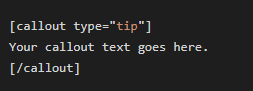
Replace tip with one of: tip, note, caution, or warning.
Examples
Link Behavior
All links in knowledge base articles have automatic behavior applied by our custom JavaScript. You do not need to manually set "open in new tab" — it's handled for you based on where the link goes.
| Link type | Opens in | Examples |
|---|---|---|
| External links (different domain) | New tab | https://irs.gov/..., https://stripe.com/... |
| Links to other KB articles | New tab | https://www.fidelityprivateshares.com/support/how-to-... |
| Links to HubSpot File Manager files (PDFs, etc.) | New tab | https://fs.hubspotusercontent.com/... |
| Same-page anchor links | Same tab |
|
Our JavaScript checks every link on the page after it loads. If a link points to a different domain, a different page, or a downloadable file — it gets target="_blank" applied automatically. Only links that start with # (or point to a section on the current page) stay in the same tab.
Anchor / Section Links
You can link to a specific section within an article using anchor links. These are useful for long articles or for linking from one part of the site to a specific sub-section of another article.
How headings get IDs
Our JavaScript automatically assigns an id attribute to every heading (h1–h6) on the page when the article loads. The ID is generated from the heading text — lowercased, with spaces and special characters replaced by hyphens.
| Heading text | Generated ID / anchor |
|---|---|
| Getting Started | #getting-started |
| Step 1: Create Your Account | #step-1-create-your-account |
| FAQs & Troubleshooting | #faqs-troubleshooting |
| What is a 409A Valuation? | #what-is-a-409a-valuation |
Linking to a section on the same page
- Identify the heading text of the section you want to link to.
- Convert it to a slug: lowercase, replace spaces and special characters with hyphens, strip leading/trailing hyphens.
- In the editor, select your link text and click the Link button.
- Enter just the hash, e.g.
#getting-started. - Click Apply. This will scroll the user to that section without leaving the page.
Linking to a section on a different article
- Find the full URL of the target article, e.g.
https://www.fidelityprivateshares.com/support/equity-management. - Append the section anchor:
https://www.fidelityprivateshares.com/support/equity-management#cap-table-overview. - Use this full URL as the link href. It will open in a new tab (per our link rules) and jump directly to that section.
To find the exact anchor for any heading: open the article in your browser, right-click the heading, choose Inspect, and look for the id="..." attribute on the heading element. That value, prefixed with #, is your anchor.