
Introduction
This article will show you how to document the addition of a new common or preferred stock class. If the addition of the stock class is in conjunction with a round of financing, we recommend that you use the Equity Financing workflow as the addition of a new stock class is included in that process.
This process will document the addition of the stock class that has been executed outside of the platform. You will need to upload the amended Charter and associated approvals and legal filings.
Change Authorized Shares workflow
The addition of a new stock class is part of the Change Authorized Shares workflow. Follow these steps to add a new stock class.
- On the Company Workspace go to Start New Workflow > Change Authorized Shares or Par Value.
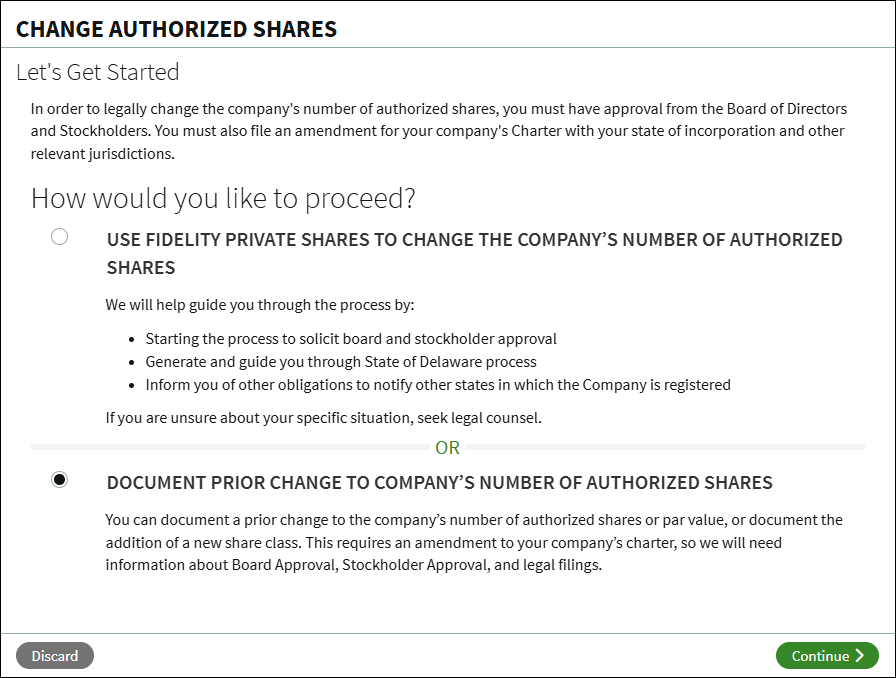
- Select Document Prior Change to Company's Number of Authorized Shares and click Continue.
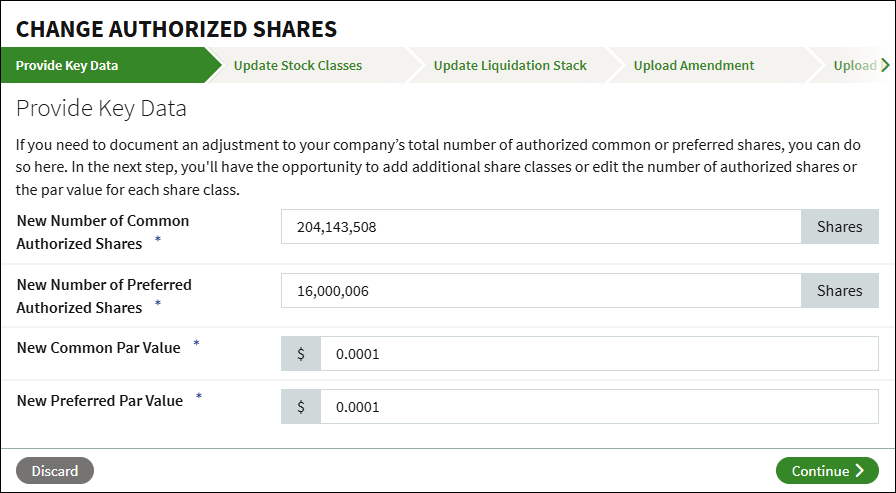
- If necessary, update the total authorized amounts for the common and preferred stock classes. Note that this total should include the authorized amounts for the new stock class(es). Click Continue.
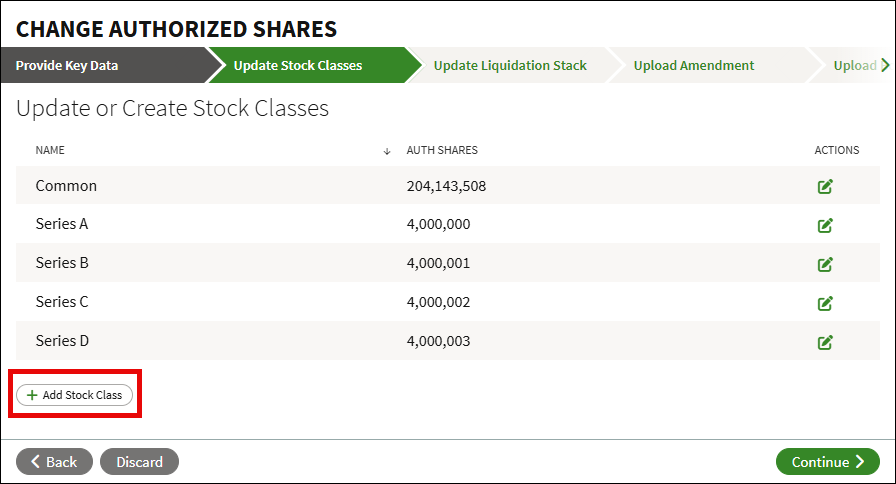
- Click Add Stock Class.
- Enter the details of the new stock class. The details should match the information in your amended Charter; if you are unsure of any of the details you may wish to consult with your legal counsel.
Select a class name from the Class Name drop-down menu. To enter a custom class name, choose Custom Name from the list and then enter the desired name. If you are adding multiple classes of common stock, select Custom Name for each class so that each one can be uniquely identified.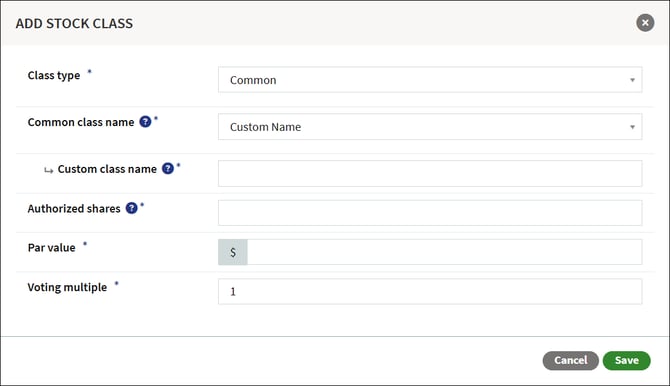
Once all information has been added, click Save. - Repeat the above step if you need to add any additional classes. To edit any existing class, click the Edit icon in the Actions column. Otherwise, click Continue.
- If any changes need to be made to the liquidation stack, if applicable, drag and drop the stock classes into the correct liquidation order. Otherwise, click Continue.
- Upload your amended Charter. Click Document Options and select to upload the document from your computer or choose the document from the Data Room.
- Upload the associated Board Approval that approved the addition of the new stock class. Click Document Options and select to upload the document from your computer, choose the document from the Data Room, or defer uploading the document to a later time. Enter the effective date of the approval, and select the type of approval.
- Upload the Stockholder Approval. Click Document Options and select to upload the document from your computer, choose the document from the Data Room, defer uploading the document to a later time, or if applicable waive the approval.
- At the Checkpoint, review the uploaded documents. If desired, you can send the workflow to legal review before proceeding. Once ready, click Continue.
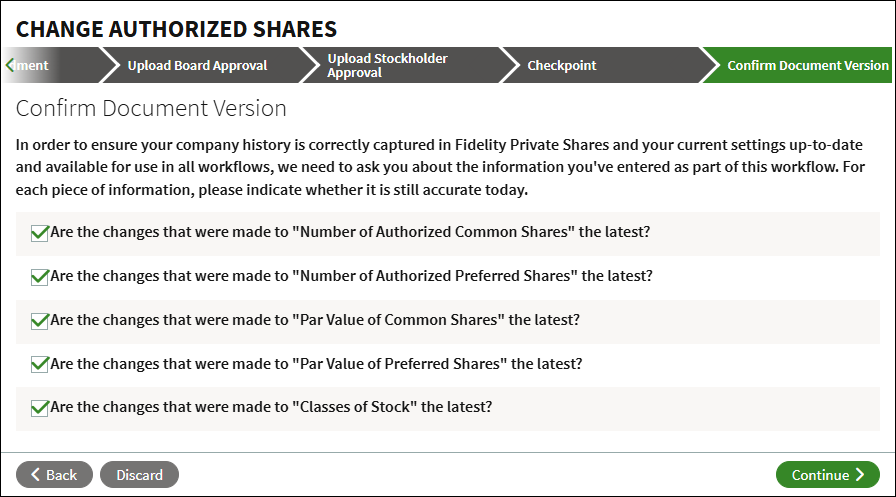
- For each item listed, confirm that the changes made as part of this workflow are accurate and current as of today, and click Continue.
- At this point, the amendment has now been reflected and the new stock class has been added to the cap table. All uploaded documents will be placed in the corresponding folder in the Data Room.
Screenshots are for illustrative purposes only.
Fidelity does not provide legal or tax advice. The information herein is general in nature and should not be considered legal or tax advice. Consult an attorney or tax professional regarding your specific situation.
Fidelity Private Shares LLC provides cap table management and other administrative services to private companies and their equity compensation plans.
Fidelity Private Shares LLC
© 2026 FMR LLC. All rights reserved.
1222015.1.0